How would you go about updating the BIOS on a motherboard?
Updating the BIOS (Basic Input/Output System) on a motherboard is a process that involves downloading the latest BIOS firmware from the motherboard manufacturer’s website and then flashing it onto the motherboard’s BIOS chip. Here’s a step-by-step guide on how to update the BIOS:
- Identify Your Motherboard Model: Determine the exact model and revision of your motherboard. You can usually find this information printed on the motherboard itself or in the user manual. Make sure to download the correct BIOS update file for your specific motherboard model.
- Download the Latest BIOS Update: Visit the website of the motherboard manufacturer and navigate to the support or downloads section. Locate the BIOS update for your motherboard model and download the latest version to your computer. Make sure to download the appropriate BIOS update file for your operating system (e.g., Windows, Linux).
- Prepare a Bootable USB Drive: In some cases, you may need to create a bootable USB drive to flash the BIOS. You can use tools like Rufus (for Windows) or dd command (for Linux) to create a bootable USB drive and copy the BIOS update file onto it. Follow the instructions provided by the tool to create the bootable USB drive.
- Backup Important Data: Before proceeding with the BIOS update, it’s a good idea to back up any important data on your computer. While BIOS updates are generally safe, there is a small risk of data loss or system instability during the update process.
- Enter BIOS Setup: Restart your computer and enter the BIOS setup utility by pressing the appropriate key during the boot process. The key to enter BIOS setup varies depending on the motherboard manufacturer but is typically Del, F2, or F10. Consult your motherboard’s user manual or look for on-screen prompts for the correct key.
- Update BIOS Using Built-in Utility: Some motherboards include a built-in BIOS update utility that allows you to update the BIOS directly from within the BIOS setup utility. Navigate to the BIOS update section and follow the on-screen instructions to select the BIOS update file from the USB drive and initiate the flashing process.
- Update BIOS Using Manufacturer Software: Alternatively, you can use manufacturer-provided software to update the BIOS from within the operating system. Run the BIOS update utility and follow the on-screen prompts to select the BIOS update file and initiate the flashing process.
- Follow On-Screen Instructions: During the BIOS update process, follow any on-screen instructions provided by the BIOS update utility. Do not turn off or restart your computer until the BIOS update process is complete. Interrupting the update process can result in a corrupted BIOS and may render your motherboard unusable.
- Verify BIOS Update: After the BIOS update process is complete, restart your computer and enter the BIOS setup utility again to verify that the BIOS firmware has been successfully updated to the latest version. Check the BIOS version information to confirm that the update was applied correctly.
- Restore BIOS Settings: If necessary, restore any custom BIOS settings that you had configured before the update. You may need to reconfigure settings such as boot order, CPU settings, memory timings, and other parameters based on your preferences and hardware configuration.
By following these steps, you can safely and effectively update the BIOS on your motherboard to the latest version, ensuring compatibility, stability, and optimal performance of your computer system.
About the author : motherboardworld
Related posts
Popular products
-
 5D10S39656 13.3" FHD touch Lcd screen module For Lenovo ideapad Flex 5 CB-13IML05
Original price was: $179.00.$159.00Current price is: $159.00.
5D10S39656 13.3" FHD touch Lcd screen module For Lenovo ideapad Flex 5 CB-13IML05
Original price was: $179.00.$159.00Current price is: $159.00.
-
 5D10Z52008 14" 2240x1400 Lcd screen panel For Lenovo ideapad Yoga Slim 7 Pro-14ITL5 14ARH5
Original price was: $149.00.$129.00Current price is: $129.00.
5D10Z52008 14" 2240x1400 Lcd screen panel For Lenovo ideapad Yoga Slim 7 Pro-14ITL5 14ARH5
Original price was: $149.00.$129.00Current price is: $129.00.
-
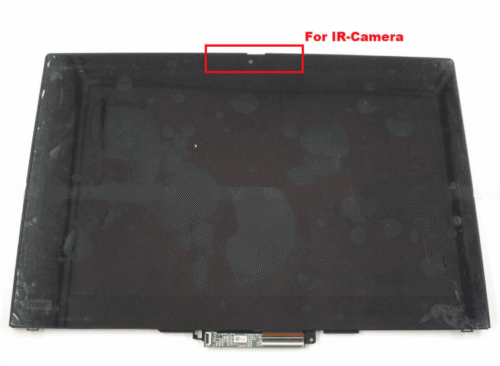 5M10Y75555 13" FHD Touch Lcd Screen for IR camera For Lenovo ThinkPad X13 Yoga Gen 1th
Original price was: $229.00.$199.00Current price is: $199.00.
5M10Y75555 13" FHD Touch Lcd Screen for IR camera For Lenovo ThinkPad X13 Yoga Gen 1th
Original price was: $229.00.$199.00Current price is: $199.00.
-
 5D10S39563 14.0" FHD touch Lcd screen module For Lenovo ideapad Flex-14IWL 14APL 14IML
Original price was: $189.00.$169.00Current price is: $169.00.
5D10S39563 14.0" FHD touch Lcd screen module For Lenovo ideapad Flex-14IWL 14APL 14IML
Original price was: $189.00.$169.00Current price is: $169.00.